HOW TO DRAW A REALISTIC IMAGE IN PHOTOSHOP - Part II
Article by Irene Laschi
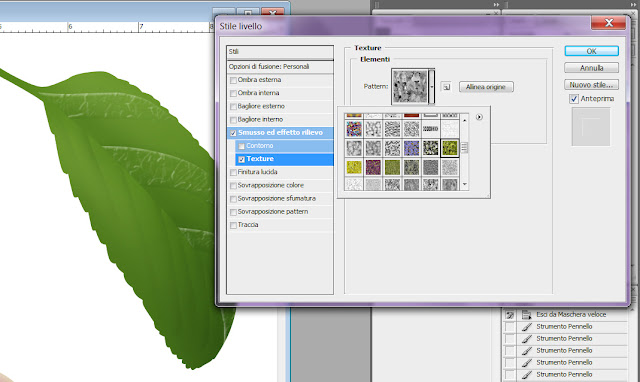
In this specific case I chose the Bevel and Emboss effect, changing its default settings to obtain the wanted result (it had to seem very natural).
To have a more realistic result, I added also shadows with the same brush but on a different layer (Color Burn mode). I used a blue- green.
You can add lights and shadows in every moment, even after the following steps: don’t forget to add them on different layers.
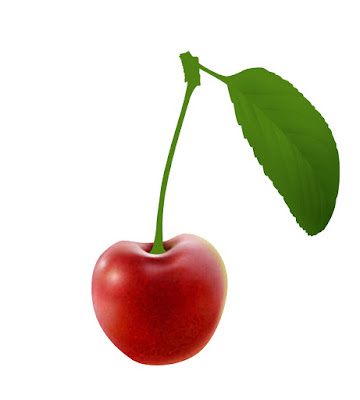
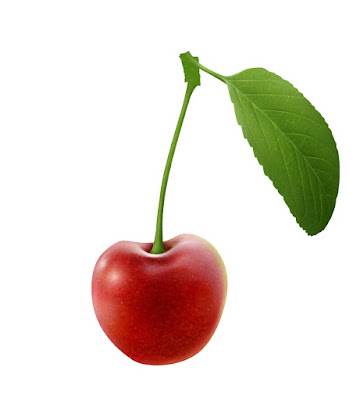
This week I'll explain how to draw the leaf and finish the Cherry illustration.
STEP 7: Adding shadows on the leaf
Create a layer, Multiply mode, above the others.
Selecting the paths I made for the leaf veins, create a selection (right click: anti-alias on, 0 px feather) and start working on this new layer with a very soft brush (low opacity and flow as always).
I created more than one layer (one layer = one color) within a group to find the perfect balance between generic shadows and specific shadows on the leaf, using dark green and a blue-green. Deselecting and adding a layer mask to the group, erase with a soft erase tool the areas that seem too intense.
STEP 8: Adding texture
To enhance the realistic effect, I used a custom Photoshop effect to create little veins between the main ones.In this specific case I chose the Bevel and Emboss effect, changing its default settings to obtain the wanted result (it had to seem very natural).
I applied the texture mode within this effect, choosing a texture that recalled me the little veins.
There are a lot of custom textures you could use in Photoshop, and spending little time in changing their default settings you can have a lot of different results - they could be used to give a realistic feeling on a lot of different subjects (I often use them in food illustrations).
Here a couple of screenshot of my settings (in Photoshop CS3) and the final result:
STEP 9: Adding lights and shadows on details
To bring out the veins I added some lights with a little soft brush. I chose a very pale green on a Normal mode layer.To have a more realistic result, I added also shadows with the same brush but on a different layer (Color Burn mode). I used a blue- green.
You can add lights and shadows in every moment, even after the following steps: don’t forget to add them on different layers.
This process will take quite a long time and you’ll have a lot of layers, but it allows you to adjust their intensity, their opacity and their colors in every moment.
STEP 10: Adding more texture
Surfaces in nature are always imperfect, and I decided to add more texture to avoid the "perfection" of the Photoshop effect.
I added dots like I did on Step 3, using yellow - adjusting its hue/saturation/brightness to have the right color.
I adjusted its opacity too: it shouldn't be that visible, just a suggestion.
I loved so much this effect that I decided to add it on the cherry too (even if it was already done), to make its skin more imperfect, especially on light areas, and to give consistency to the whole illustration.
I loved so much this effect that I decided to add it on the cherry too (even if it was already done), to make its skin more imperfect, especially on light areas, and to give consistency to the whole illustration.
Don't forget to add and/or adjust lights and shadows!
STEP 11: Adding details on the stem
First of all, the upper part of the stem should be yellow/brown: select it and add the right color.
Now the steps - i.e. the method you use to draw lights, shadows and textures - are the same as above.
Here a little reminder and a guideline.
Using paths to create the selections, add shadows and lights like we did for the leaf.
I added some dark texture (dark dots) on the stem and on the leaf, where needed.
As I did for the cherry, I added some reflected lights on a different layer. In this case the nearest object was the cherry and I used red in Soft Light mode.
To see other images drawn with this method, take a look here
If you missed Part 1, you can find it here
And now, some notes.
These illustrations were made for a specific purpose - i.e. a tutorial for a magazine, and the client asked me for that (photorealistic images, and all the steps to make them).
Usually, when drawing, I want to be less photorealistic: I want my illustrations to be realistic, but at the same time they should be an interpretation of reality and not just the copy of a photo.
Don't take a photo and just copy it as it is: no client would ask you for that when the photos themselves are available and he could buy them.
Use the photos as a reference to understand volumes and surfaces, create your own sketches and compositions, and then draw using Photoshop as an artistic media.
The tutorial above could be used to draw a lot of different subjects, and not only in a photorealistic way: take these suggestions and find your own way!
Hope the tutorial (and the notes) were useful!
Feel free to ask if you have any question - next time I'll talk about Photoshop brushes, stay tuned!


Comments
Post a Comment